Creating a USB Adapter for the Xbox Controller
This hack / mod shows you how to create a USB adapter that can plug into the expansion slot of your Xbox controller. Among other things, this allows you to easily use off the shelf USB flash drives as a memory card to save Xbox content / game saves.
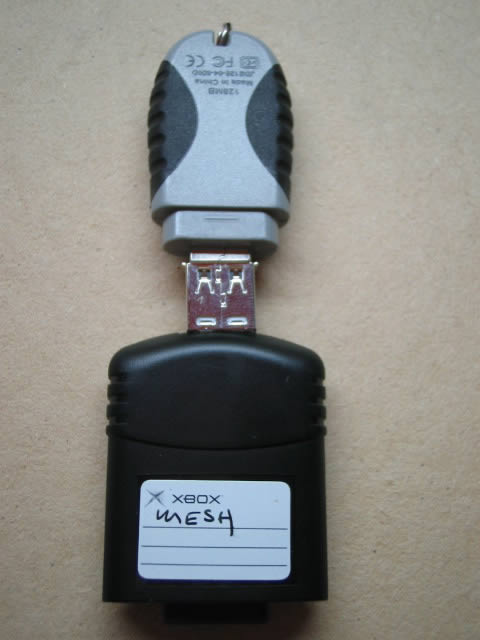
For example, after doing the mod, I was able to use my 128 Meg Lexar Jumpdrive Secure as an XBox memory card.
Note, if you use a USB Flash drive as an Xbox memory card, the Xbox will first erase all of its contents, so make sure to remove anything that you cannot afford to loose. Also, not all drives will work. Check this page from the Xbox-Linux site to see a pretty comprehensive list of which drives are known to work.
Note, you can easily break your controller (I burned one out while putting this together), and possibly your Xbox by doing this hack. Furthermore, you might be voiding your Xbox warranty by futzing around with the memory unit. Do this tutorial / hack at your own risk.
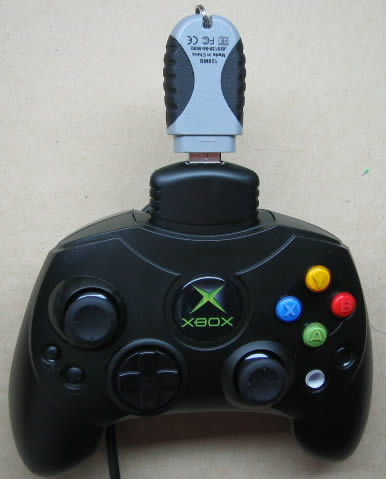
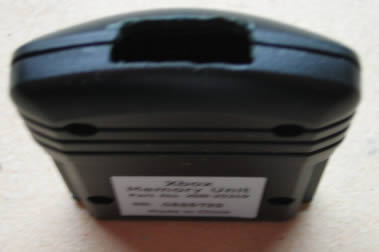
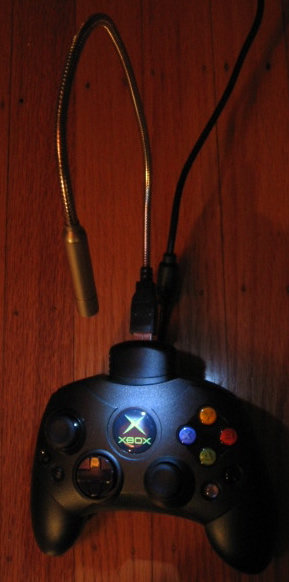
Here is what the final mod will look like:
Here are the parts you will need:
- Wire (recommended 4 colors, red, black, green and white)(I used a small gauge stranded wire).
- Female USB plug (you can buy one or just remove one from an existing USB extension cable)
- Xbox memory unit (if anyone knows where to get these without the memory included, post it in the comments)
- Solder
and here are the tools you will need:
- Very Small Phillips Screw driver
- Solder Iron (15w recomended)
- Wire Cutters
- Wire Strippers
- Hot Glue Gun
- A rotary power tool, such as a Dremel
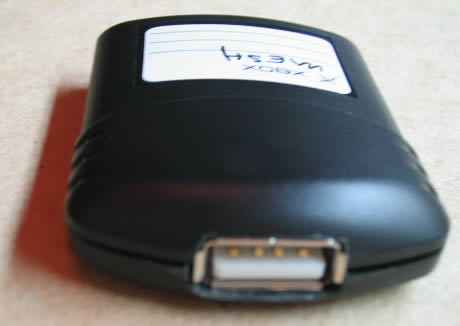
Basically, we are going to take apart the Xbox memory unit, remove the memory from it, and convert it into a USB adapter. Don’t worry about wasting the memory within the memory unit, as we will use that in another Xbox hack where we will add the memory directly to the controller (coming soon) (you could also wire up a USB cable to it and use it with your computer, or with the Xbox adapter you are making in the mod).
First, turn the memory unit on its back, and locate the four small phillips head screws. Using a small phillips head screwdriver, remove them and set them in a safe place. Note, make sure you have the correct size screwdriver, otherwise you will probably strip the screws.
Once you have removed the screws, separate the two pieces of the memory unit’s shell.
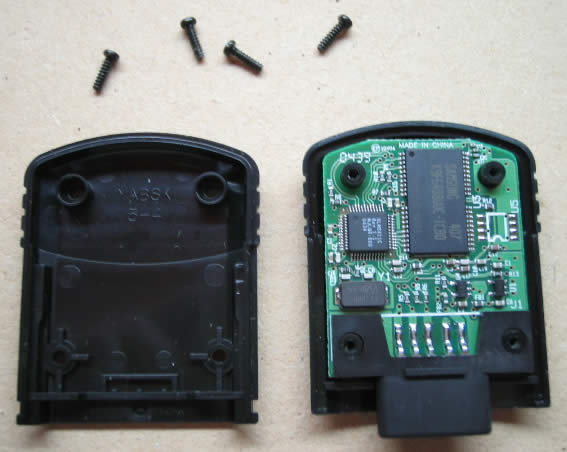
The actual memory unit / circuit board just sits on the pegs within the unit. Lift this up to remove it, and then set the shell / case to the side.
If you are curious, my memory card contained a Samsung 8M x 8 Bit Bit NAND Flash Memory chip.
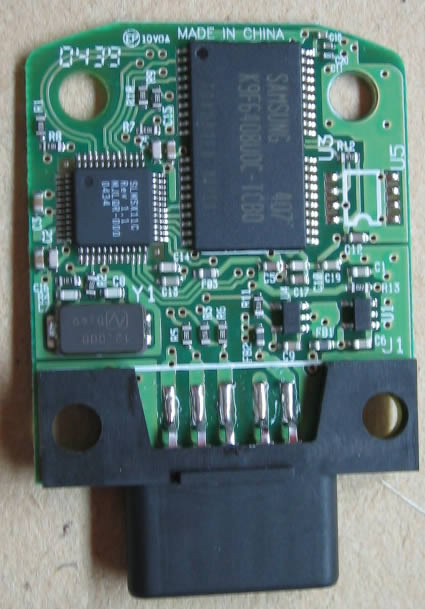
Now, we need to disconnect the circuit board from the plastic adapter that connects into the xbox controller. It is only connected via the 5 solder points in the middle. There are two ways to separate the board from the adapter. The best was is to use a large flat soldering iron tip and de-solder the connections. However, if you don’t have a large flat soldering iron tip (I didn’t), you can also use wire cutters to cut the connections. Very carefully snip the 5 connections from the Adapter to the circuit board. Make sure to snip as closely to the circuit board as possible, and do not lift up after you snip (you might lift the traces).
Once you snip or de-solder the connections, the adapter will separate from the circuit board.

Set the circuit board to the side. You can use this in the future in another hack (coming soon).
Now, take your USB female adapter. You can purchase this from digikey, or you can carefully remove one from an existing USB extension cable (which is what I did). I suggest that that you actually buy one, as the connector will probably be in a little better shape, (I wasn’t patient enough to wait for mine to arrive from Digikey, so I just took a cable apart).
The adapter should look something like this:
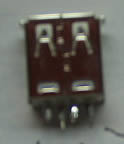
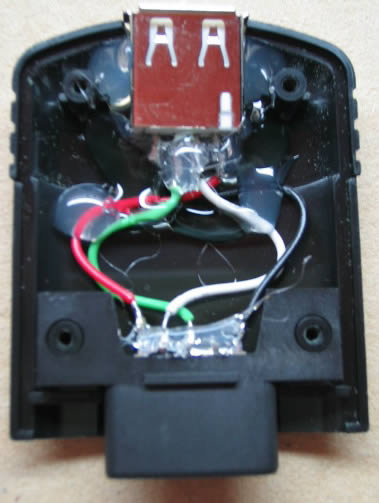
Notice that there are 4 connections coming out. They are +5V (red), Data - (white), Data + (green), and Ground (black). If you are removing the adapter from an existing cable, make sure you keep track of which connection connects to which color wire. This is very important. If you are not sure, then check the diagrams here or here.
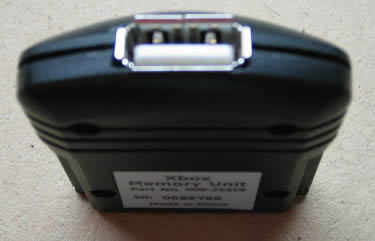
Before we begin to reconnect the wires, we need to create an opening within the unit’s shell to place the USB adapter. Basically, we will use a rotary tool to cut a small rectangular notch in the top of the unit which the USB adapter will sit within. The notch will be at the top of the adaptor and will be split between the two unit pieces like this:
Measure the height and width of your adapter. Place the memory unit shell pieces together, and at the top and mark / notch off the height on each side of the top. Then, divide the height in half, and tape / mark that number as the depth on each side of the unit.
Using your rotary tool, cut out the notches on each side. For the first cut, err on the side of making it too small rather than too large. Once they are notched out, use a polishing attachment to smooth the sides of the notch.
Place the USB adapter, with the flanges on the outside of the unit shell, and then try to attach the unit pieces together. Adjust the size of the notch until you have a nice fit.
Once you have notched out the opening for the USB adapter, you are ready to wire up the adapters. Basically, we need to wire the USB adapter to the memory unit’s adapter that connects to the Xbox controller. This is pretty simple, but you have to be sure that you connect the wires correctly.
First you need to get your wires ready. Position both of the adapters within the shell (it doesn’t matter if they are oriented correctly). Measure the distance between the USB and Xbox adapter’s contacts, and cut four pieces of wire that are a little longer than that distance. If you can, use 4 different colored pieces of wire (Red, White, Green and Black). Once you have cut the wire, strip the ends to leave about half a centimeter of wire exposed.
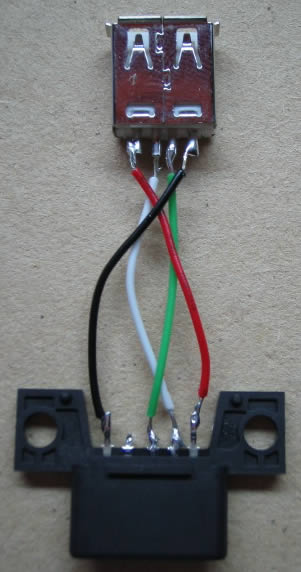
Now, remove the USB adapter from the shell, and begin to solder the wires onto its leads. The colors should be hooked up as follows:
- Red : +5V
- White : Data -
- Green : Data +
- Black : Ground
Check and double check that you are connecting these correctly. If you wire them incorrectly, the adaptor will not work, and you can risk damaging your controller (I accidentally crossed my power and ground wires, and burned out the USB hub inside one of my Xbox controllers).
Once the wires are soldered to the USB adapter, it is time to connect them to the Xbox controller adaptor. Notice that the adaptor has 5 connections, and not 4. This is because it has one extra connection that is used for light guns. We can ignore this wire.
If you look through the end of the adaptor, you will see that it is split into two sections (one with 2 connections and one with 3 connections). With the three connection side on the left, the wires are:
- +5V
- Data -
- Data +
- Divider
- Video Sync (ignore)
- Ground
Here is an diagram:

Now, this is very important. Make sure that you orient the USB adaptor to the xbox adaptor correctly. The xbox adaptor should lie with the section of two connections on the left, and then the front of the unit shell would go on top of it. Double check this by looking at the adapter slot for the xbox controller.
Once you have it oriented correctly, and have identified which connection is what, you can then solder the wires from the USB adapter to the Xbox adapter.
Once the wires have been soldered, double check that you connected the wires correctly, and that you don’t have any shorts (two wire connections touching).
Once you have checked everything, it is time to test it out. Put the adapters back into the case, making sure to fit the Xbox adapter onto the posts correctly. For now, dont worry about getting the USB adapter to fit in the slot, just let it hang out. Put the front and back on, and put two of the screws in (one for each side). Plug in a USB drive that you know will work (check this list) into the USB adapter.
If your controller is connected to the Xbox, turn off the Xbox and disconnect the controller. Take the unit and carefully plug it into the Xbox controller. Plug the controller back into the Xbox and then turn it on on and boot into the Xbox Dashboard.
If you smell something burning, or see a puff of smoke coming from your controller, immediately turn off you Xbox as you have accidentally crossed the +5V and ground wires (I know this from personal experience). Fix the wires, and try again.
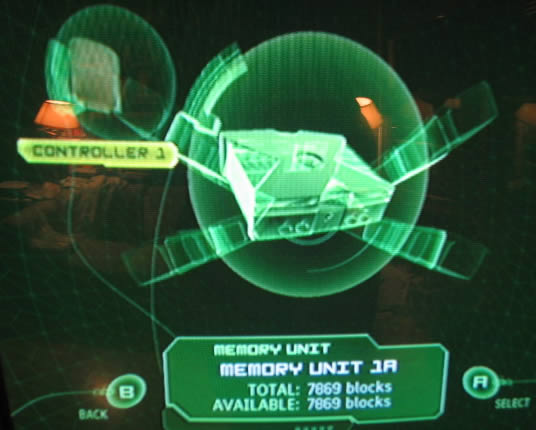
In the Xbox dashboard, select Memory. You may get a message that the memory card could not be read and was erased. That is ok, and means it was recognized. You should see your controller listed on the memory screen.
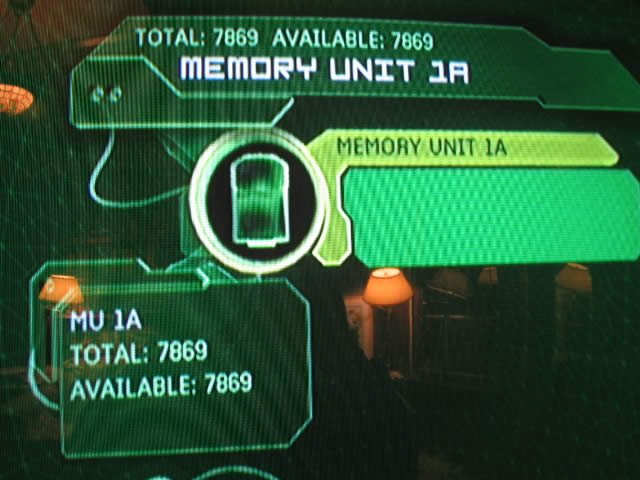
and if you select it, can get details about the USB drive.
If you get this, they everything is working. Turn of your Xbox and use the needle nose pliers to carefully remove the adaptor (grasp it by the adapter connecting to the Xbox and not the wires).
If you get a message that the memory is damaged then your USB drive is not supported (again, check this list). If nothing appears, then you may have the wires connected incorrectly, or your drive may not be supported. Turn off the xbox and remove the adapter with needle nose pliers. Check that:
- the wires are connected correctly.
- there are not any shorts.
- none of the wires got disconnected.
You can also use a multi-meter to check that power is getting the the adapter. Just plug in the adapter, turn on the Xbox and check the Red and Black wires. The multi-meter should read around 5 Volts. If it reads -5, then you connected the Black and Red wires backwards. If it doesn’t read anything, then the Red and / or Black wires may not be soldered to the Xbox adapter well.
If you confirm that the Red and Black wires are connected, double check to make sure that the Green and White wires did not get reversed.
Once you have confirmed that everything is working, then you can do the final assembly. This involves placing both adapters within the unit shells, securing the USB adapter with hot glue, and closing and fastening the unit’s shell together.
Again, make sure that you place the adapters in the correct way. Looking down from the top (with the front of the unit facing up), the section of the xbox adapter with two connections should be on the left side. Double check the connection within the controller to confirm you have it in the correct way.
First, plugin your hot glue gun, and give it a couple of minutes to warm up. Once it has warmed up, put a generous amount of hot glue on both the Xbox and USB adapters where the wires are connected. Do this on both the top and the bottom. This will help secure the wires, and will also act as an insulator.
Give the glue a couple of minutes to dry before moving onto the next step.
Next, place the Xbox adapter on the two posts within the front piece of the memory shell unit (make sure that it is placed in the correct direction). These pins will hold it in place. Next, carefully position the USB controller inside the notch that you made at the top. Check that it is correctly position (the lip of the adapter should be flush with the outside of the shell), that the top piece of the shell will fit on top correctly and that none of the wires have came loose. Holding the USB adapter in place, put a generous amount of hot glue around the adapter to secure it. You should also place some glue on the actual wires to hold them in place within the shell.
Once the glue has dried, place the back piece of the shell on the unit, and reattach the screws (4 total). Plug the unit into your xbox with a USB drive connected, and double check that everything is still working.
You now have a portable USB adapter for the xbox controller. You can use this to use USB Flash drives as Xbox memory cards:
You could also connect and power pretty much any USB device. For example, if you have trouble finding the buttons when playing in the dark, just connect a USB light to light up your controller:
If you are running Linux on the Xbox, then you should be able to hook up a mouse and a keyboard through the connection to use within Linux (I haven’t tested this, so if anyone confirms it, put a note in the comments).
Finally, you can take the old memory chip from the memory unit, and attach a USB Male connector to it, and continue to use it as a memory card (or an 8meg flash card for your computer). You could also open up the controller, and install the 8 megs of memory directly in the controller. However, both of these tutorials will have to wait for another day.
If anyone knows where to get the Memory Unit shell and adapter without the circuit board, post it in the comments. That would make this much easier and economical.


